Monday, June 30, 2014

just a pillow cover


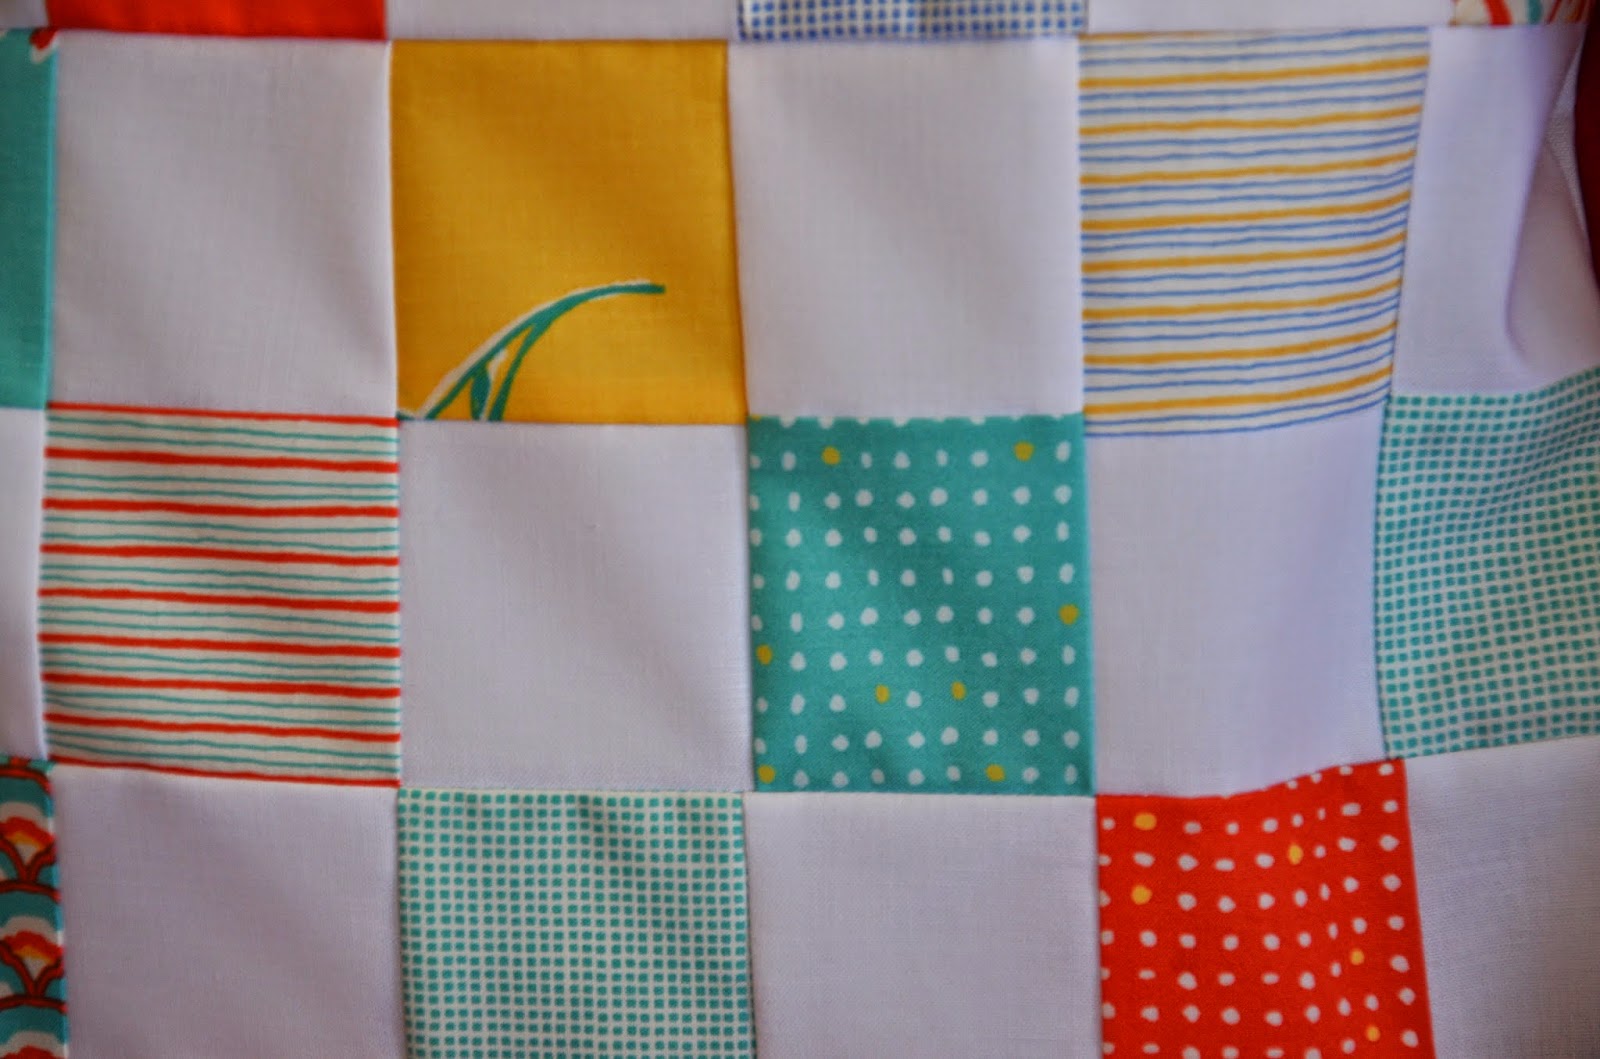
Several nights ago I haphazardly pieced some leftover fabric coordinates. The finished "top" was too small for a playmat or quilt, so I decided to make another envelope pillow cover.  I actually haven't made one of these in a few years, but I was excited to find the tutorial I originally used was still available here courtesy of Cluck Cluck Sew.  It is easy to follow, the creative possibilities are endless, and it makes for a rewarding beginner project.

If you're a quilter, then you can clearly see I didn't take great care in piecing these 2 1/2 inch squares together.  I know there's a method to the madness, and I know better, but it was 11 at night, my baby was finally asleep, and I just wanted to make something.  Anything.


So I randomly started sewing them together.  And it was almost the perfect size for a 15x15" cover...slightly long one way and a tad short on the other, but it would work.

It only required two fabric rectangles in addition to the front cover.


Using her instructions, I quickly pinned and stitched, right sides together.


I contemplated adding batting and quilting the cover itself, but decided to leave it as it was.

The colors alone make me happy.


Friday, June 27, 2014

meet my brother

Two days ago I decided I was getting myself a serger.  For the longest time I didn't really need it because I did more quilting than anything, but when I recently started sewing clothing, I thought it finally time to do so.


I had actually been contemplating this purchase for a long time and read various reviews, but I kept putting it off.  I didn't know if it was worth spending the money.

The problem is, I suffer from serger-phobia.  Its appearance alone with multiple spools (rather large spools, I might add) feeding in all directions is incredibly intimidating.  I mean, how on earth do you thread this thing?  I feared it might end up collecting dust in the corner of the closet, simply because I feared IT.

But my hope is that my "garments" might look a tad more polished and professional, and the only way to improve my sewing is to continue challenging myself with new obstacles.

So here I will share what I learn as I go, starting with the most basic of skills: figuring out how to turn it on.

Ha!

I went with the Brother 1034D and found it on Amazon.  This seems to be a pretty basic serger and quite popular, I might add; the reviews were decent.  It also looks like it's been around a while, as the married couple on the box look to be hitched circa 1990.


It even came with some handy thread in primary colors to get started.  I guess this means I can use regular spools instead of those humongous ones?  That's a bonus in itself.

So, if you're new to serging too and want to share your progress or offer some insight, please feel free to do so.  I would love having people along on this new adventure...

Wednesday, June 25, 2014

it's a WIP wednesday

I'm hoping if I designate Wednesday as my WIP (work in progress) day, I might actually get some of my projects finished.  I don't have much free time these days, so a few hours during the weekends is my only chance to be creative.

I have a quilt top that I started for Sophia a while ago.  I never finished it because I wasn't fond of the colors...typically I prefer lots of whites and brights, but I veered away from my normal path with a darker red and yellow and pink.  It's still not particularly pleasing to my eye, but I really want to finish it at this point.  I just can't decide what to back or bind it with, so if you have any suggestions, please comment.  


This other WIP resulted from insomnia last night.  I was wired, everyone else was asleep, so I just started sewing some scraps left over from a jelly roll.  As usual, I didn't have a plan.  Typically, my unplanned adventures result in a pile of wasted fabric.


Unfortunately, I only had a few coordinates, so I'm not sure if I will make this into a pillow or a mini/doll quilt, as it's not even large enough to be a playmat.  We shall see...

I am terrible at following rules.  I didn't measure, nor did I pin, and my cutting was careless.  I know there's a particular way to piece these so they lay nice and flat, corners nesting into one another just so.  But I'm either too stubborn or lazy, or both.  I did press all my seams, though, so hopefully the finished product won't be too wonky.

Sunday, June 22, 2014

custom baby bibs: a tutorial


Looking for a custom baby gift that doesn't break the bank?

While I have sewed baby bibs from scratch, sometimes you need to make a gift in a pinch.  This raw edge applique bib can be customized and completed in two hours or less, assuming you have the necessary supplies.

Gather the following:
  • blank baby bib (Blank bibs are available in a variety of colors at Target, Wal-Mart or on Amazon)
  • colorful fabric scraps for your letters
  • iron-on adhesive (Wonder Under, Heat n Bond, etc.)
  • white 100% cotton thread and a sewing machine, or a sewing needle if you don't have a machine
  • cardstock
  • scissors, pen
Select a desired font via a word processing program and print your "outlined" letters onto cardstock, as this is more durable and easier to trace than paper.


Cut out your letters.  When you encounter the "middles" you can just snip a straight line through to finish cutting.


After cutting all letters, place them on the bib to be sure they will fit before continuing.  Adjust, as needed.


Trace all of your letters and shapes upside down (see photo) onto the paper side of the iron-on adhesive.


Carefully cut out your letters and shapes, leaving a slight space around each.


Select your fabrics.  This is a great way to get rid of those fabric scraps!

Place the letter (or shape) glue side down onto the wrong side of the fabric.  Carefully press your iron over the shape until it has adhered to the fabric.  Do not rub.  Do not use steam.  If you're unsure how long to press, read the instructions for your particular adhesive first, as they vary slightly from brand to brand.


Once you have ironed all of your letters and shapes, you should have a colorful little pile ready for trimming.


Cut out each letter along the lines you have traced.

When you encounter "middles" in letters, gently fold the letter in half and snip a small slit.  Then carefully cut around the inside using micro-tip scissors.  I use these, but there are many types available that would work.  Good quality scissors are definitely key when completing this project.


Once all letters have been cut, you can peel the paper backing from each.

Depending on the brand of adhesive that you use, some can easily be peeled.  Others require a bit more manipulation.  When that happens, you can gingerly use the tip of your scissors to take the paper off.  If you do this, just be extra careful not to cut through your fabric.


Arrange your "ready to iron" letters on the bib with the adhesive side down.


Press and lift your iron until the letters are "stuck" onto the fabric.  I usually hold the iron down for 2-3 seconds, then lift, then press again in a different spot, making sure I attend to all the letters.

Again, please check your adhesive's instructions if you're not sure about heat settings on your iron.


Now you should have a stack of bibs ready to be stitched.

Almost finished!


You can either leave the bibs as is or "finish" them with some thread.  If you do not have access to a sewing machine, you can use embroidery thread and a needle to stitch around the letters for extra durability.

If you are using your sewing machine, sew a straight stitch around the edges (and insides!) of all your letters.  If you haven't done this before, it's like tracing and takes some practice.  It can be a bit tricky, but it gets easier the more you do it.

I prefer white thread because I like the contrast.  However, if you use a different color, remember to use white thread on your bobbin so it blends well on the back side of the white bib.


And there you have it...ready to be gifted to someone special!


Sunday, June 15, 2014

three little pigs and a baby dress


It was a beautiful Father's Day weekend, so we were delighted to get out in the sunshine.  It was in the 60s earlier today, so Sophia was able to wear her new dress with some skinny jeans...something her mother never has and never intends to wear in this lifetime.

While I have very little free time these days, I use what rare moments I do have to scour the Internet for free tutorials, as well as patterns I'd like to eventually try.  My current obsession is baby attire for obvious reasons, but more specifically dresses, as they take up less fabric and seem more forgiving of errors.

I found this dress/top tute with similar end results on two different blogs: Sew Can Do and Prudent Baby.  I decided to use my Minny Muu Three Little Pigs fabric for the dress.


While I do love 100% cotton fabric, it was a wrinkled mess in no time, not to mention it was soaked in baby drool.  But the major benefit is it's light and comfortable in the heat.

I tweaked the pattern a bit: gathered and finished both the neckline on the front and back, added a button instead of snaps, decreased the width and increased the length by adding some additional pink fabric to the bottom.

As one of the tutorials suggested, I made my own bias tape for the armholes.  There are several helpful instructions online explaining how to make and sew bias tape.  Dana of MADE created an awesome video, which explains everything in greater detail.  It is wonderful and really makes a difference in the appearance of the finished product.  By cutting it correctly, it also made sewing around the curves much easier with less puckering.


Instead of leaving the bottom curve of the neck open, I sewed all the way around and just left the short end unstitched.  It was like a long tube with one opening, and it was relatively easy to pull right side out.  I did press the seams open beforehand to make them nice and crisp.


I then pressed and finished it with a straight stitch around the entire border, closing the opening before adding a button and buttonhole.

Then I attached the pink neckpiece to the body of the dress.  This step was a bit tricky for me, but fortunately it worked out (whew!).


It fits her now, but I have a feeling it won't for very long, as she's growing like a weed in only one direction.  Up.


Saturday, June 14, 2014

a pinny for your thoughts

I love the look of pinafores on baby girls.  Perhaps it's their simplicity or that they are just timeless.

As I searched for more tutorials, I came across this pinafore circa 1912 from the MET, which proves this style has been around for well over one hundred years.  It looks very similar to the crossover pinafore I made for Sophia after finding a free tutorial here courtesy of Maggie at Smashed Peas and Carrots.

While this was quick to sew, it did use up a lot of fabric, which is worth it if you intend to make it reversible.  I have yet to add buttons to the other side, so the polka dots remain hidden, but that's an easy fix.

In making this, I learned some important lessons along the way:
1) Cutting corners is imperative (literally, but not figuratively).    Prior to turning the pinny right side out, one needs to carefully trim the edges so it lays flat when finished (per the instructions).  I did not do this well and rushed, so my rounded edges weren't as round as they should have been.  Notice they look a tad geometric.


2)  Invest in some coordinating buttons.  I have a random assortment, and finding two that actually matched was quite a feat; the pair I did find was shiny and purple, which didn't work well with these particular colors.

Still, I didn't want to leave another project unfinished so I thought they'd be okay for this pinafore.  Wrong!  See below.  (Yes, I need a pedicure.)


Alas, I had already sewn them on and wasn't sure what to do.  Then I located another helpful tutorial on how to make fabric-covered buttons that didn't require a kit.  Hooray!

So I traced (use disappearing ink or chalk) and cut...


Stitched all around the outer edge so the button was covered...


Then pulled, gathered, and knotted it so the stitching was hidden.

All finished!


Now if only she'd stay still long enough to get a decent photo...


Tuesday, June 10, 2014

fabric lovin': minny muu by lecien

Cotton fabric is still my favorite.  Perhaps it's because that's what I'm most comfortable with and what I've used most often when sewing my quilts and other baby goods.  Or maybe it's just the fact that there are so many beautiful prints from which to choose.

Case in point: the Minny Muu 2014 collection by Koko Seki for Lecien.  I have always loved whimsical, colorful prints, but since having a little girl I'm even more drawn to them and always contemplating what I could make - so many possibilities.  This collection includes tiny elephants, three of the littlest pigs and a miniature red riding hood.

I went all out and purchased the half yard bundle of all 30 prints because I couldn't decide nor resist these itty bitty details.   If you'd prefer to sample just a few, there are still some remaining at Pink Castle Fabrics.  But you should probably hurry, before they're all gone...


Monday, June 9, 2014

the geranium dress: a pattern review


I purchased the Geranium Dress pattern by Rae Hoekstra well before Sophia was born, but I had never sewn an article of clothing, so the task seemed daunting.

This particular dress pattern seems to have a cult following online, and I love seeing the various versions that bloggers post for all to see.  My little one is growing very fast, so I knew I had to tackle this sooner rather than later.  Besides, I have a lovely stack of fabric just waiting to be turned into something sweet.

I had purchased a linen blend voile from Miss Matatabi's Etsy shop.  It is light and airy and quirky and perfect for Virginia's humid summer.

Fortunately for me, the pattern was beginner-friendly and very easy to follow --the directions clear and thorough, and the photos detailed enough that I could follow along without growing frustrated.  I was able to sew the dress in one day, and while I made a few (okay, several) errors along the way, I love that Sophia had a new dress to wear out this evening.

This was my first time using the buttonholer on my sewing machine, so those came out a bit crooked.  I also struggled with the ruffled sleeves...had trouble getting the zigzag stitch just right on the edges, and wasn't careful in the placement so they're not quite even.

But the dress is soft and sweet, light and airy, and Sophia doesn't notice the flaws.  The pattern is classic and versatile, so I'm looking forward to making some more of these for my little one in the very near future, assuming she actually naps.

If you're new to garment sewing, like I am, and want to stitch up something special for your little lady, consider giving this pattern a try...it's available in sizes newborn to girls' 12.


Monday, June 2, 2014

another work in progress completed


Before Sophia was born, I had several months in which I intended to create for her some mom-made blankets, burp cloths, and quilts.

But as my belly grew bigger, it became more of a challenge to assemble and baste quilt sandwiches on our living room floor.  As a result, I didn't sew as much as I would have liked and several items just never got finished.

One of those creations was a simple baby blanket-quilt with her name in raw edge applique.  I wanted it to be similar to my personalized burp cloths...just a pop of color on a clean white background.  However, I just never got around to working on it.

So when she decided to sleep in yesterday -a rare occurence- I knew I had to take advantage of the opportunity to finish it.

I used Robert Kaufman's orange Ta Dot for the back, Warm & Natural batting inside, and Kona in white for the front.  I adhered the scrappy letters with Heat n Bond, then straight stitched around the edges.  I admittedly took the easy way out by doing a mock binding and then quilted back-n-forth randomly with my machine to keep it all together.

It is completely imperfect, a tad rushed, but made with love...and after being tumble dried, it is all crinkled and ready for action.