Thursday, December 6, 2012

a minky blanky mishap

Well, perhaps I was too confident...

Knowing that one of my closest friends is due to give birth to a baby boy sometime in January, I have been thinking about what handmade gifts I can sew for him.  I finished a quilt top a few days ago and I think I've found the fabric with which to back it:  brown polka dot flannel on sale at Jo-Ann's for only $2.99 a yard!

However, I thought it would be fun to stray from my normal routine in an attempt to learn some basic sewing skills.  After all, I made plenty of Barbie and Cabbage Patch doll clothes when I was a kid, so it couldn't be too hard, right?  (Did I mention those doll clothes were often lopsided?)

So when I spotted some adorable teddy bear fabric at Jo-Ann's today, I thought it would be fun to try and sew a "simple" baby blanket backed with brown minky.  I have never sewn with this fabric before, so I didn't quite realize its reputation.  After all, it's soft and cuddly!  But today I learned (the hard way) that sewing with it is-especially for a beginner-a bit of a disaster.

Many have attempted this task before me, so while it's nothing new and fresh, I'll still offer my basic how-to, then I'll end with what I've learned and what I'll do differently in the future.

I started by gathering all of my "ingredients" for a baby blanket: front and back fabric, a cutting mat, rotary cutter, fabric scissors, and coordinating thread (I used brown 100% cotton thread).


I laid the cotton fabric on my board and cut out a 26x24 inch piece.  (In the future I would use at least a 30x30 square of fabric for this.)  I cut the minky to the same size, although this was a tad trickier than the cotton.

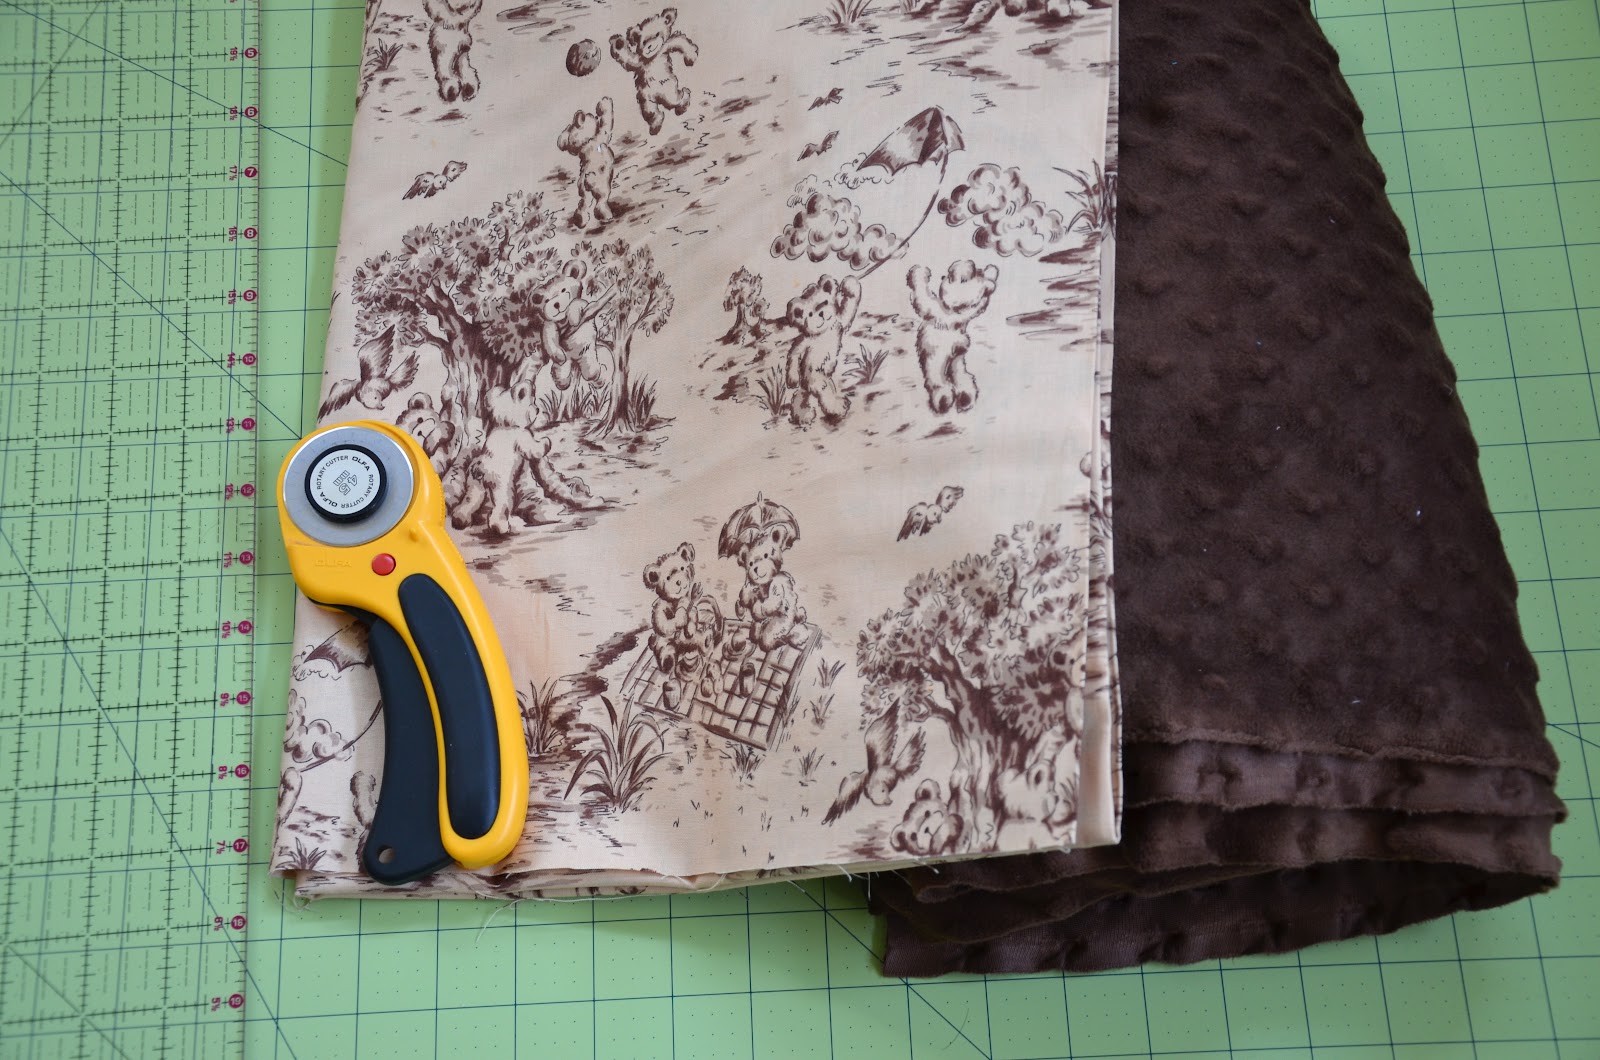
Once cut, I put the right sides of the two fabrics together, while flattening everything out as nicely as possible and pinning.  I think I redid this 3 or 4 times, because the fabric kept bunching. In hindsight, I should have pinned them together even more.

Using one of my new Fiestaware bowls (this seems to be the popular choice for rounded corners), I cut around the edges.  Note: FIRST, use a tracing pen or pencil, THEN cut.  I made the hasty mistake of trying to rotary cut around the bowl, which proved a foolish idea.


With all edges pinned, I sewed together the raw outside edges of the blanket (about 1/2 inch in from the edge), leaving a 3- or 4-inch opening to easily turn it inside out later.


Once I was done with this, I turned the blanket right side out and ironed it so everything was smooth and set in place.  TIP: DO NOT iron minky dot fabric on a high setting.  In fact, you probably shouldn't iron minky fabric at all.  I didn't realize until the very end that I had mistakenly flattened some of my minky dots into mini pancakes.  (Yoi!)


In hindsight, I would have pre-washed and ironed the cotton fabric prior to making the blanket. (Again, a beginner's mistake!)

I then pinned the opening closed (making sure the raw edges were tucked in first) and sewed a final seam about 1/4 inch around the outer edge of the blanket.


I washed it on gentle setting in cold water with some Woolite.  Taa daa!


What I learned...
  1. Minky is stubborn, slippery, and stretchy.
  2. Do not iron minky dot!
  3. Pin together your two fabrics like crazy as the minky bunches and stretches like nobody's business.
  4. Pre-wash any non-minky fabric, as it will shrink and minky won't.
Perhaps I should stick with cotton fabrics from now on?

Good luck!

Wednesday, December 5, 2012

free motion: take 1

While I appreciate all of the high-end, computerized machines that can embroider and quilt exactly what a human on the other end programs, I really admire the skills of incredibly creative folks out there who are able to use their sewing needles like fine paintbrushes.

Free-motion quilting seems to require an endless amount of practice and patience.  I have not yet attempted it on a quilt, but I am determined to learn how to do it.  I have been playing on smaller bits of fabric with the feed dogs down just to get a feel for it.  It's harder than it seems...I found it very difficult to control what I wanted the needle to do.  So for now I'm "drawing" on the fabric just for fun.

Here is my first attempt at a quilt block with some fabric scraps.  As you can see, there's a bit of bunching and stretching of the fabric.  I need to learn how to minimize this because it distorts the block. And while this is more like free motion scribbling than anything else, I am looking forward to practicing and (hopefully) improving in the process.

Saturday, December 1, 2012

happy december

During the week I daydream about what I'd do with my free time if I didn't have a real job.  Once Friday arrives, I anxiously drive home in hopes of having some quiet creative time.  But I typically crash and burn on the couch by 7.

I woke early on Saturday with two goals in mind: 1) to complete my first quilt block and 2) to start the quilt top for a friend's baby boy, due in January.  Fortunately I was able to finish both, which rarely happens.

The quilt block is block #1 from the Fat Quarter Shop's Mystery Block of the Month.  I joined the club nearly a year ago because I wanted to push myself to finish at least one small project a month.  However, despite them sending me 7 months' worth of blocks, I am just getting to the first.


While I admit I'm not a fan of geometric-looking blocks, I wanted to try this to challenge myself.   I am relatively new to quilting and have so much to learn, so I need to continue stepping out of my comfort zone.  I am slow and clearly need some expert tips on how to improve my measurements and angles so that everything lines up just so...


My friend is having her first baby in January, so I asked her to select some fabric so I could make him a quilt.  She picked At the Farm by Robert Kaufman, so I assembled a little quilt top this morning.  I'm hoping to stop by Jo-Ann's sometime this week so I can back it with some soft brown minky.

I have some other ideas in the works for this little guy...